HOW TO BLEACH DARK ROOTS
Do you have very dark roots that you are trying to lift and lighten?
In this tutorial, we are going to learn how to bleach roots. Without getting any banding or breakage.
Let's first watch this video to get the overall idea of what we are going to need to do if you want to bleach roots up to blonde:
BLEACHING DARK ROOTS - WATCH VIDEO:
Hair by Ashley Betancourt, NY.
Products Used:
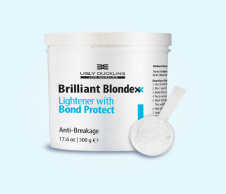
Brilliant Blondexx Bond Protect Bleach with 30 Vol Developer
Pearl Blonde Toner 10V with 20 Vol Developer
Brilliant Blondexx Shampoo & Mask
STEP ONE: MAKE YOUR BLEACH MIXTURE

Brilliant Blondexx - Bleach with Bond Protect
- We would suggest you use Brilliant Blondexx with Bond Protect.
- It contains Bond Protect & will all you to lift quickly and easily without unnecessary damage.
- Use 30 Vol developer when the hair is very dark and when you want an ultra white blonde result.
- Be careful: this bleach processes very fast, especially at the root area. You will need to work fast and rinse fast.

Dark Regrowth Needing to be Fixed

Bleach & Developer Mix with Brilliant Blondexx: Not too runny, not too thick.
STEP TWO: APPLY TO THE ROOT AREA
- Apply the mixture to the root area.
- If we apply right onto the scalp area, the heat will cause that part to be whiter than the rest & we will end up with a visible line of demarcation.
- On the other hand, if we overlap with the white hair, that could lead to breakage.
- So it's a fine line between the two. Apply as near as you can to the scalp & work as fast as you can.
- You can always wipe back any sections where you may have overlapped.
- Make sure you press well with the brush. Your goal must be to saturate that area as much as you can. You need it to come into a lot of contact with the bleach mixture, otherwise you won't get the lift.
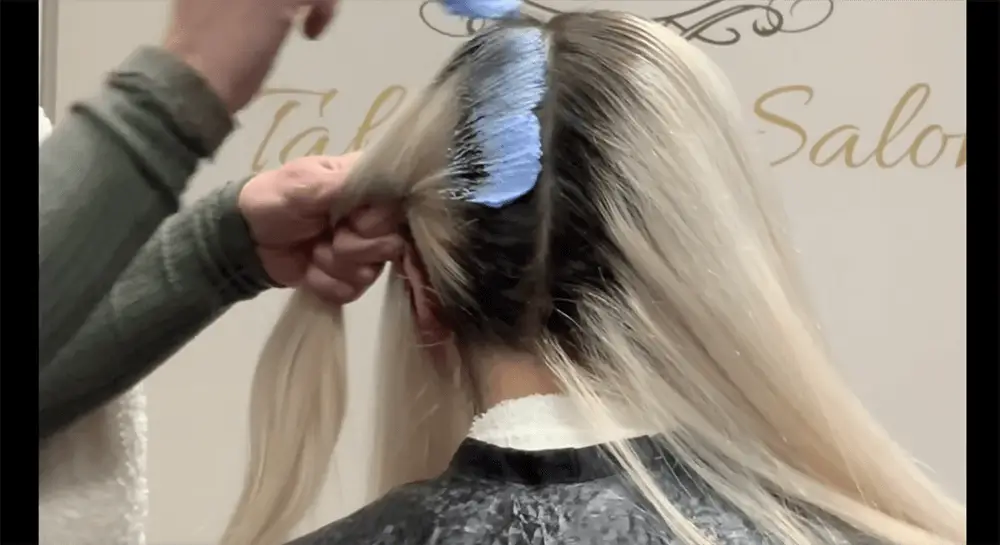
Apply to the root area

Make sure you press on the brush & saturate well.

Re-apply bleach if necessary to make sure you have put enough product on the area which needs lifting
STEP THREE: CHECK & RINSE WHEN THE HAIR IS LEVEL 10
- The real art is knowing when to rinse.
- Look at the first picture below - this is NOT yet ready for rinsing. It may look pale yellow but once you wash it will be more like orange - yellow. Which is not good when you are trying to get to white blonde.
- Look at the second picture. That is where you need the hair to be when you are ready to rinse.

Hair still too yellow - Do not rinse this yet!

This is whiter...
STEP FOUR: APPLY TONER
- After rinsing we see that the hair is super white right near the scalp - that scalp heat issue is hard to avoid. It will happen.
- On the other hand the rest of the regrowth is still rather yellow. Very yellow.
- We are going to use a mixture of silver blonde (10B) and pearl blonde toners (10V). Both from Ugly Duckling.
- These are no lift toners packed with blue and purple pigments and are excellent for neutralizing yellow.
- There is literally nothing more powerful under the sun.
- We mix them with 20 Vol.
- After 15 minutes of processing, we extend the toner to the ends.
- You can see that the pigments in the toners are already taking effect and are turning the hair blue, purple and grey.
- Rinse when done.
- You can see the perfect white blonde results that we got.

After rinsing - see how white it is near the scalp, whereas the rest of the regrowth is rather yellow.

Apply toner from the back

Rub in toner a second time and extend - you can see the purple & blue

The Final Result.
Hair by Elona Taki.
WATCH VIDEO TUTORIAL NOW:
Which professional bleach is the best for root lifting & bleaching?
It really makes a difference what quality of bleach you use.
Using a good quality bleach will significantly reduce processing time (in other words, the amount of time the bleach mix is sitting on your client's hair).
It will also allow you to use lower strength developer - thus saving your hair!
Finally, it will give you better lift and a better, more seamless result.
We would recommend Ugly Duckling's Brilliant Blondexx for regrowth and root operations.
The reason is that this bleach contains Bond Protect - one of the only professional bleaches which does.
As a result the hair is protected during the bleaching process.
Thanks to Brilliant Blondexx, the bleach is also more comfortable when used in near-scalp situations.
You (or your client) should find that it is more comfortable, less itchy for that reason.
Brilliant Blondexx Bleach - Best Professional Bleach for Bleaching Roots
To learn more, go here.
How do you prevent banding when you bleach the roots?
Always pay great attention to the level your hair is at.
Only bleach the parts that need bleaching.
If after bleaching, you still see a band of yellower hair, don't panic.
You will be able to fix this at the toning stage provided you use Ugly Duckling cream based toners, which do have some lift built in.
First apply the toner on the parts that look most yellow, wherever that is.
That way you will be able to even out the inconsistency and banding.
Which is the most effective toner for toning my client's roots and hair once I have lifted?
If the hair has been lifted to a true level 10, use Pearl Blonde Toner 10V or Silver Blonde Toner 10B
If the hair has only been lifted to level 8 or 9, and there is still a lot of yellow left, use Intense Pearl Blonde Toner 100V or Intense Silver Blonde Toner 100B.
If you are aiming for a true white platinum blonde, use purple based 10.2 Extra Light Cold Blonde. But make sure you have prelightened the hair all the way to level 10.
Always start applying your toner at the part where it is the most yellow.
That way you will be giving the most development time to that part & that way you will equalize out the hair.