Everyone is trying to get "the fabulous level 10 blonde result".
Stylists are constantly asking other stylists: "Which toner did you use to get that?"
But people forget that before you can even begin to tone, your bleaching needs to be perfect.
In this blog, our aim is going to be to help you bleach really, really well.
We are going to give you a 10 step routine which will get you the blonde result of your dreams.
Keep reading!
WATCH THIS FABULOUS BLEACH & TONE OPERATION:
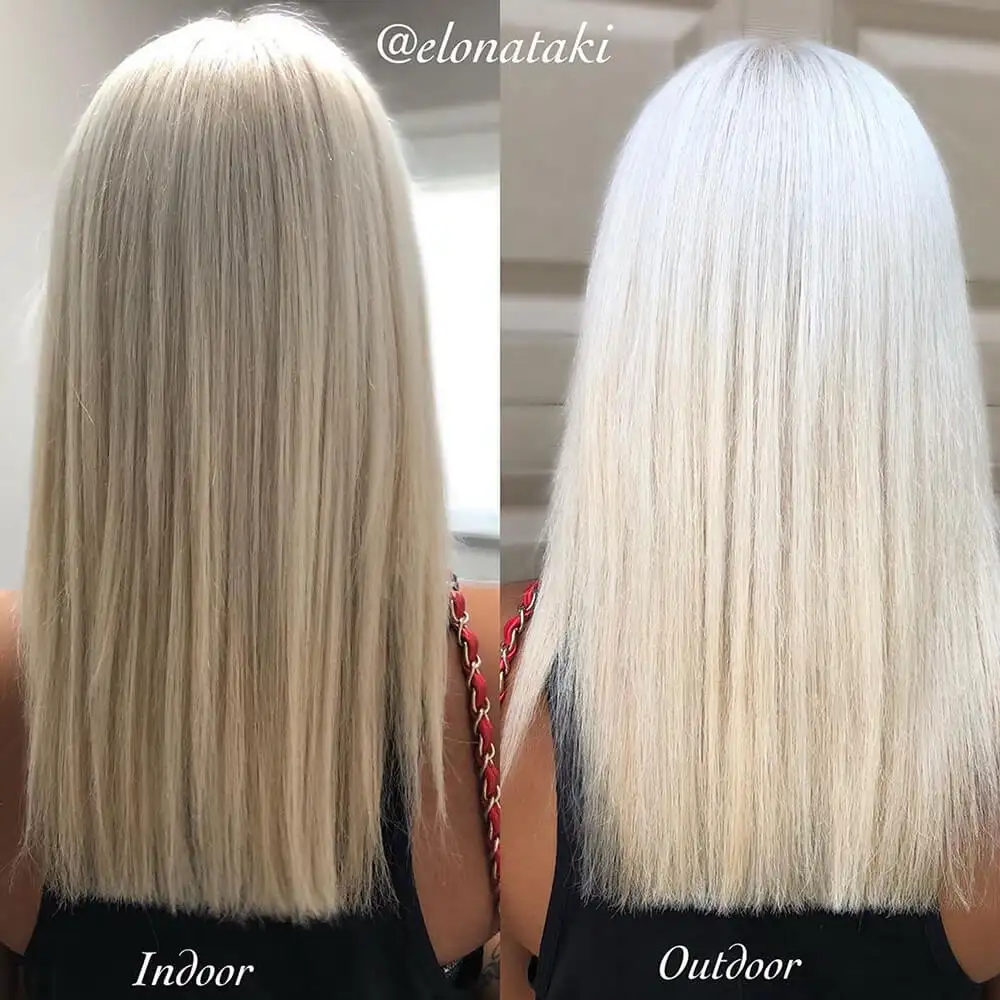
Hair by Elona Taki
Step One: Analyse the hair & Decide Your Bleaching Strategy
First, start off by opening up your client's hair and taking a careful loo at the roots, mid lengths and ends.
If they are at different levels, you will need to figure out where you are going to apply bleach and when.
The rule is to apply the bleach first on the darkest parts, the parts that need the most bleaching.
Then you extend to parts which are a little lighter, but still need bleaching.
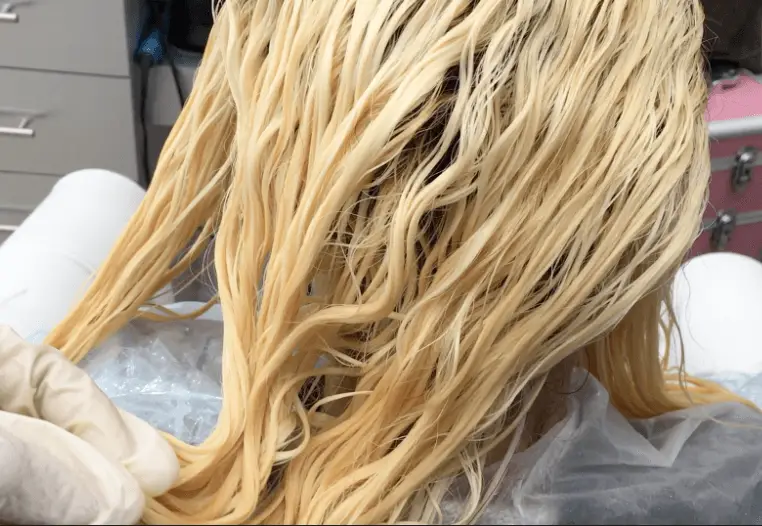
And be sure never to overlap onto parts (like the ends in the picture below) which are already white and could break if they are over-bleached.
.jpg)
A typical case: Roots are virgin regrowth level 6, mid-lengths are level 8 and brassy, ends are level 10.
Step Two: Choose The Right Bleach
Based on your hair analysis above you are ready to choose your bleach.
Don't make the mistake of thinking that all bleaches are the same. Nothing could be further from the truth.
They all have different lifting properties. Using a bleach which does not lift well will force you to use higher developer strength than necessary.
Even then you may get inconsistent results.
Ugly Duckling recommends that you use one of the bleaches below depending upon your client's hair situation.

Brilliant Blonde - 8 level Lift Blue Based Bleach
This is literally one of the most powerful bleaches on the market.
Use this for Ultra Dark Asian hair and for hair color removal operations.
Use this bleach primarily on the lengths.
If using on the root area, use with 20 Vol only and for short applications.
Because it is powerful!
Here is what the bleach will look like after mixing - a thick gravy-like mix.

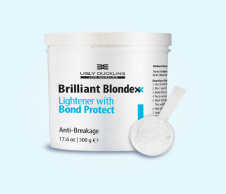
Brilliant Blondexx - 7 level lift White Bleach with Bond Protect
This bleach is a white bleach with Bond Protect built in.
It gives an excellent balance of hair protection and lift and is really also very powerful indeed: its lifting capability covers almost all regular needs.
When mixed with developer, it produces a creamy white mix which is pleasant to apply and non-irritating on the scalp.
It can be used very easily for all full-head and on-scalp bleaching operations, because it is so gentle.
It protects the hair from breakage and will keep the hair fiber thick and resistant. So it is good for the ends also.
Brilliant Blondexx with Bond Protect:

Creamy, oil-like mix:

Step Three: Deciding on Your Developer Strength
10 Vol
This strength is almost never used in bleaching operations - it is too weak.
20 Vol
20 Vol is the most commonly used developer strength for medium lifting requirements - for 2-3 levels lift and for the root area.
Assuming that you are going to bleach the root area, you will need to get some 20 Vol developer in no matter what else you do!
30 Vol
30 Vol is the developer strength you need for anything more than 3 levels lift.
In case of very dark or very resistant hair, you can do a first application with 30 Vol on the lengths & do a second application with 20 Vol
See what we mean when we say you will need to get some 20 Vol developer in no matter what else?
40 Vol
40 Vol is really too strong to be used with bleach. At Ugly Duckling we never recommend that you use this with bleach. You will be literally blowing the hair cuticle apart if you do.
Sometimes customer say to us that they need to use 40 Vol because the bleach they are using is not lifting enough.
Our answer: are you sure you are using a good bleach? Ugly Duckling bleaches never require 40 Vol, for example.
Step Four: Prepare & Section the hair
Bleach is best applied on dried, unwashed hair. The natural oils in the hair protect it from the bleaching process.
Sometimes clients do, however, have styling products or silicon-based shampoos when they come in.
Which is why now is the time you need to open up the hair, comb it through thoroughly and section and prepare it for bleaching.
When sectioning, separate the hair into 4 large separate areas.
Tie up 3 areas and leave one down. That is the area where you are going to bleach first.
Section this part of the hair finely. Your aim is to get a really consistent penetration of the bleach mixture.
You can use foils at the first stage. This helps keep the heat in and to work faster.
Later, once you ave checked that the hair has lifted fully, you can take out the foils as a preparation for the rinsing stage.
Step Five: Mix Your Bleach & Developer
The rule for mixing bleach to developer is 1 part bleach to 2 parts developer.
This will give you a nice thick gravy-like consistency. Moist enough to work fast, but sufficiently thick so that it is not going to drip off your brush as you apply.
It will also give you good product saturation of the bleach mixture onto the hair.
When mixing, keep whisking until you have a really smooth, consistent paste with no lumps whatsoever.
Refer to the pictures above for what the bleach mixture should look like.
Step Six: Apply Your Bleach - Saturate & work Fast
Now you are ready to start applying. If you are new to this, don't be tentative, whatever you do.
You need to whack on the bleach mixture and really really saturate the hair. So no feeble jabs, please.
Also, you need to be fast The reason you need to act fast is that with bleach, the clock is always ticking away.
You want to get all parts of the hair as equal processing time as possible in order to get the most consistent result possible.
Step Seven: Knowing when to Rinse
A lot of customers ask us: "How long should I leave the bleach on the hair?"
The answer to that is: It depends on how light it is.
It can take anything from 15-20 minutes when you are lifting level 6 dark blonde to level 10.
It can take 30 minutes and even a little more when you are lifting level 3 dark brown to level 10.
What you need to do once you have applied your bleach is to keep checking the hair to see how it is lifting.
The rule is to rinse only when the hair reaches very palest yellow.
Sometimes stylists rinse too soon. The picture above shows what level 10 hair looks like at the backwash.
Notice that it looks literally almost white - with very very little yellow.
Once you towel dry it will look slightly darker and slightly more yellow.
Remember: do not under-bleach. Your client is looking for you to take her blonde!

This is what level 10 looks like at the backwash.
And this is what level 10 looks like when towel-dried.
Step Eight: Purple Toning After Bleach
After rinsing, you need to rinse with an acidic hair care product. This will help close the cuticle and return the hair to its natural acidity.
People often say that you should use professional products and this us true.
But people forget to say that these professional products need to be acidic, and not all of them are.
All Ugly Duckling hair care products are acidic.
We would recommend that you use Brilliant Blondexx Hair Care with Bond Protect if the hair is very thin and you want to make it thicker and more resistant.
We would recommend that you use Brilliant Blonde Purple Hair Care if the hair is still very yellow and wish to tone it at the back wash before you apply a regular toner.

Brilliant Blonde Purple Shampoo at the Back wash. The purple helps to tone the hair after bleaching and reduce yellowness
Step Nine: Toning the hair after bleaching
Ugly Duckling has a wide range of colors and toners you can use.
Use Ugly Duckling's intense toners (intense pearl blonde & intense silver blonde) if the hair still has a lot of yellow in it and you want to push to significantly blonder.
Intense Pearl Blonde 100V

Intense Silver Blonde 100V

Use Ugly Duckling's regular toners if the hair has been well lifted and now you just want to re-pigment.
Silver Blonde 10B

Pearl Blonde 10V
.jpg)
You can also use Ugly Duckling's blue based blond colors such as 10.b, violet blonde such as 10.2/10V and a variety of purple based and silver grey hair colors in order to get more individual and personalized effects.
10.1b

10.2/10V

7.22 (7VV)

Purple Grey

Silver Grey

The Final Result: Hair After Bleaching & Toning

Step Ten: Maintaining the hair after bleaching
Use Ugly Duckling's Brilliant Blondexx hair treatment range (shampoo plus mask) at least twice a week.
This range is acidic (meaning it closed the hair cuticle and returns the hair alkanity to its natural level), so it prevents split ends.
The range also contains Maleic Acid (Bond Protect). Meaning the product strengthens the hair cuticle from the inside, making it more "plump" and healthier looking.
Brilliant Blondexx Haircare with Bond Protect - Makes Hair Thicker, Stronger & Prevents Breakage.