Choosing the right toner for your client's highlighted hair is so important.
Many women come in to the salon with dull and lifeless hair and they are looking to you to liven it up, lighten it and take it blonde.
But how do you do this in a reliable way?
And get the best results?
And with all the choices going around, how do you choose the best toner that is the most appropriate for your client's newly lifted highlights?
In this blog tutorial, we are going to cover all these points. And give you a real life salon example that you can follow.
So keep reading!
Before Highlights, Before Toning

Brassy Hair with a Dark Base
Let's say your model has hair as you see in the picture above.
This is a very normal salon situation. Hands up if your have a client who came in to your salon with hair like this in the past week!
The mid-lengths and ends have clearly been lightened in the past, although not very much and not very well.
They are now a level 6, and very brassy and orange.
The root area is a large regrowth area representing perhaps 6-9 months of regrowth, and it is brown level 5.
What does your client want?
Our client wants blonde highlights.
After consultation with her, we are also going to put in a darker smudge root into her hair.
Smudge roots are very very popular these days. They look good and not too "done-up".
Plus they are fairly low maintenance. If your client has grey hair at the root area, smudge roots are a great way of covering all that up.
They are also quick and easy to do.
How do we highlight this hair quickly and easily?
For this hair, which is fairly dark and brassy, we needed to lift this hair from level 6 to level 9: by around 3-4 levels.
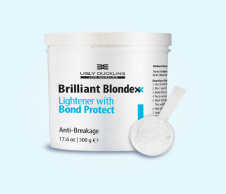
For that, we used Brilliant Blondexx - our lightener with Bond Protect Built in.
Brilliant Blondexx can lift up to 7 levels with just 20 or 30 Vol developer, so it is a really powerful and effective - and safe - tool.
It's the only lightener with this level of Bond Protect built in.
So you don't need to add anything to the mix to protect the hair.

Brilliant Blondexx - with Bond Protect built in to prevent hair damage
How to Use & Apply the Bleach
Make your mix with either 20 or 30 Vol developer. In this case (3 level lift, using foil) we chose to use 20 Vol developer.
Make your mix using the scoop provided in the bleach tub. The right mix is 1 part bleach to 2 parts developer.
This will give you a mix which is relatively wet, which is what you need to work fast.
.png)
The ideal bleach mix - fairly wet, for quick application & maximum product saturation
Before mixing, prepare and pre-cut the foils so that you don't waste any time.
Then start doing the highlights from the back, where the hair is thickest.
Keep putting the foils in at the back at the centre, working your way down.
Then start moving around until the entire head is done.
Since we are going to put in a smudge root, we don't need to go all the way up to the root.
And in any case with foils you can't go all the way up.
Keep Checking, and Rinse when you get to level 9/10
This is what your client's head should look like after all the highlights have gone in.
Once you have done this, it will be around 20 minutes - assuming you have been working fast!
So you need to start checking immediately at the back, where you started first, to see what level the hair has been lifted to.
If it is still very orange and you can see that the mixture has dried up, you should make some fresh mix (using 20 Vol developer this time only, nothing stronger) and re-apply.
When re-applying, you can just re-apply on the foil.

This is what your foiled highlights should look like
Later, once the hair has all come up to the level you need to take it up to, you need to start taking out the foils one by one.
Once all the hair has been brought up to a consistent level 9/10, and all the foils are out, it is time to rinse with tepid water.
Putting in the smudge root.
Now that you have lifted the hair, you will have blonde highlights. it's time to put in the smudge root.

We are going to use 4AA, which is a very ash brown color.
We mix our color with 20 Vol developer and we apply to the root area only.
Applying toner to the highlighted lengths
Now we need to choose our toner. To tone today, we are going to use a Blondify Liquid Gloss toner.
The advantage of this toner is that it is ammonia-free, can be used with low-strength developer and processes in only 10 minutes.
As a result, it is non lifting and won't affect or lift the darker, non-highlighted hair.
Plus, because it is in liquid form, it can be mixed right in an applicator bottle and is incredibly EASY to apply.


How do we choose which toner to apply?
What you need to do is to apply the Color Wheel principles. Use the chart below to guide you and choose the correct base of toner.
 neutralizing_colors (3).png)
Use the correct neutralizing toner for your client's hair
As you can see from the chart, you need to use a violet (or purple) based toner when the hair has been highlighted to yellow.
And you need to use a blue/green (we call it ash) based toner when the hair has been highlighted to yellowish orange or orange.
So in this case, as the hair is now successfully lifted to level 9 yellow, we used the Purple Based toner: Natural Violet Blonde
How do you mix and apply the toner?
We make our mix with low strength developer - 10 Vol. We make our mix in the applicator bottle and apply straight on the hair.
Then we rub very very thorougly.
We then leave it on the hair to process for around 10 minutes.
By this time the roots which have been done with 4AA should be nearing 30 minutes of processing, which is correct.
So now we can rinse. Once again, use tepid water.

The final result - after toning
This is the final result we got after rinsing.
As you can see, we achieved a nice smudge root.
We also achieved gorgeous highlights, with some dark hair (balayage effect) also showing through.
We chose the right toner (purple based to counteract yellow) with no lift, and with low developer strength.
As a result we got that nice dark base underneath which sets off the blonde highlights nicely.
WATCH VIDEO OF THIS APPLICATION NOW!
Dark Shadow Root on Base, and Toner Application on Highlighted Hair.
All images and video by Elona Taki, Canton, MI