Are you ready to transform your hair color with a vibrant, bold new look?
Bleaching your hair can be an exciting and cost-effective way to achieve the striking blonde results you desire.
However, if you are new to bleaching, it's important to approach the process with care and precision to ensure beautiful, salon-quality results.
In this step-by-step guide, we will walk you through the process of safely and effectively bleaching your hair.
And getting the most striking blonde results.
What You Will Need
Before you start the bleaching process, gather the following supplies:
Bleach
You will need a good quality bleach that can lift safely and efficiently. Bleaches do not all have the same formulation, nor do they all lift equally well.
A good quality bleach should be able to lift by up to 3 levels using 20 Vol developer and up to 7 levels using 30 Vol developer.
All Ugly Duckling bleaches can do this.
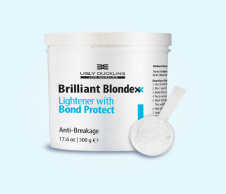
We would recommend you use Brilliant Blonde 8 level bleach if you have very dark and difficult-to-lift hair.
And use Brilliant Blondexx 7 level lift with Bond Protect technology for all other cases, especially on-scalp bleaching.
Developer - 20 & 30 Vol
Which developer strength are you going to use?
20 Vol will be enough if your hair is orange or orange yellow.
But if your hair is darker than that, or has a lot of color build-up, you will need 30 Vol developer.
In general, for bleaching dark hair, it is a good idea to keep both strengths at hand.
Very often you will need to make a second application on top of the first 30 Vol mix, and for that you need 20 Vol.
Plastic coloring bowls, feather brushes, whisk, sectioning clips, rubber gloves, foil
2 bowls and 2 brushes is a good idea.
It goes fast when you are bleaching!
And sometimes there is just not enough time to wash out, clean and dry bowls and brushes.
The whisk is nice to have to mix the bleach very quickly and efficiently.
Sectioning clips are necessary when you are doing a full head bleach.
Neutralizing shampoo and an acidic, sulfate-free conditioner or mask
You'll need these for post-bleaching care.
Neutralizing shampoos and neutralizing conditioners or masks needs to be acidic.
The acidic base is what helps to close the bleaching action and return the hair to its natural condition.
And this in turn allows you to avoid split ends and frizziness after bleaching.
Toner
You will need to choose the appropriate toner for your desired hair color result.
Ugly Duckling has a wide range of toner to select from.
Step 1: Preparation
Bleach works best on dry, unwashed hair. So do not wash the hair beforehand.
The natural oils in your scalp and hair will protect you during the bleaching process.
No need to apply any coconut oil prior to bleaching. Just use a good quality bleach and developer.
Detangle the hair by brushing it thoroughly.
If it's a full head bleaching you're doing, section the hair into four manageable sections: front, back, and each side.
If it's a root bleaching you are doing, then just prepare the root area - no need to section.
And if you are going to use foils, prepare the foils by cutting them up into large strips.
This will save time later on.
Step 2: Mixing the Bleach
Choose the appropriate developer strength.
20 Vol is right for light lifting (orange or orange-yellow to blonde) and also for the root area.
30 Vol is right for all other situations (darker hair, color build-up etc).
The right mix is 1 part bleach to 2 parts developer.
Keep whisking using your mix until you get a really smooth, wet paste.
See the video below of what Brilliant Blondexx bleach will look like after the mixing process.
This is what your bleach mixture should look like
Step 3: Application
If it's a full head application, start, as we said, from the back.
Begin applying the bleach to the back sections of your hair, working your way gradually towards the front.
Remember: don't take half-hearted steps.
You need to drench the hair in your bleach mixture, otherwise it won't work and it won't lift well.
Use the applicator brush to distribute the mixture evenly, ensuring every strand is coated.
In general it is a good idea to do the roots last. Hair develops faster there due to body heat.
Try and avoid scalp contact even when doing the root area.
Be cautious not to let the bleach come into direct contact with your scalp.
Leave a small gap between the bleach and your scalp, and don't poke the scalp with your brush unnecessarily.
Instead, keep your bush horizontal and gently deposit your bleach mixture.
You will get better results that way.
The idea is to apply the bleach mix on the parts that are darkest and thickest and need lifting the most.
And do the finer hair that needs less lifting later. This will allow you to get an even result.
Step 4: Waiting and Checking
Check your hair regularly to ensure even processing.
Peel back some of the mixture and look at the hair closely.
If you are using foils, open up a foil or two.
The generally recommended processing time for a bleach application is 30 minutes but this is really variable.
Bleach will go on processing and lifting as long as it is wet and you need to keep going until you have got to level 10: very very pale yellow.
For yellow hair which needs just to be lifted to level 10, 15 minutes of processing may be enough.
Whereas hair which is darker may need up to 40 minutes and require a second application.
Step 5: Rinsing

The picture above shows what the hair needs to look like when you rinse.
Do not under process when you bleach.
Get it to the level that you see above. Then rinse.
Step 6: Neutralizing
Once your hair has reached the desired level of lightness, rinse it with lukewarm water until the bleach is completely washed out.
Then use a neutralizing shampoo (in other words, an acidic cshampoo) to stop the bleach's chemical reaction.
All Ugly Duckling shampoos are acidic.
Step 6: Toning
After bleaching the hair, you will need to tone it.
There are a wide range of toners that you can use.
They can be no-lift toners, regular lift and high lift toners.
And as for their pigments, they can be blue based, purple based, grey based or ash based.
Choose the right toner for the hair color result that you are looking for.
You will need to mix the toner with 20 Vol and apply onto the hair.
If the hair is at one consistent level after bleaching (which hopefully it should be), apply on the root area the last, because it will process faster there.
Leave the toner to process and rinse when done.
Step 7: Maintenance & Conditioning
Try and use acid-based sulfate-free products when you maintain and condition the hair.
Sulfates can strip the color from bleached and colored hair, which is the last thing you want.
And acidic haircare is definitely a good idea. They will keep split ends and frizziness down.
Finally, try and limit heat styling. Keep down excessive heat when using a blow dryer.
Conclusion

Blonde hair strengthened with Bond Protect Shampoo & Mask.
Follow these 7 steps and you should have no problem bleaching your hair and getting it to a beautiful, consistent white blonde.
And your hair should be in perfect condition as well!